DayPilot
| Demo | |
|---|---|
| Downloads | |
| Repository | |
| Languages | JavaScript |
| Technologies | Vue.js |
| Code License | Apache License 2.0 (Open-Source) |
Overview
-
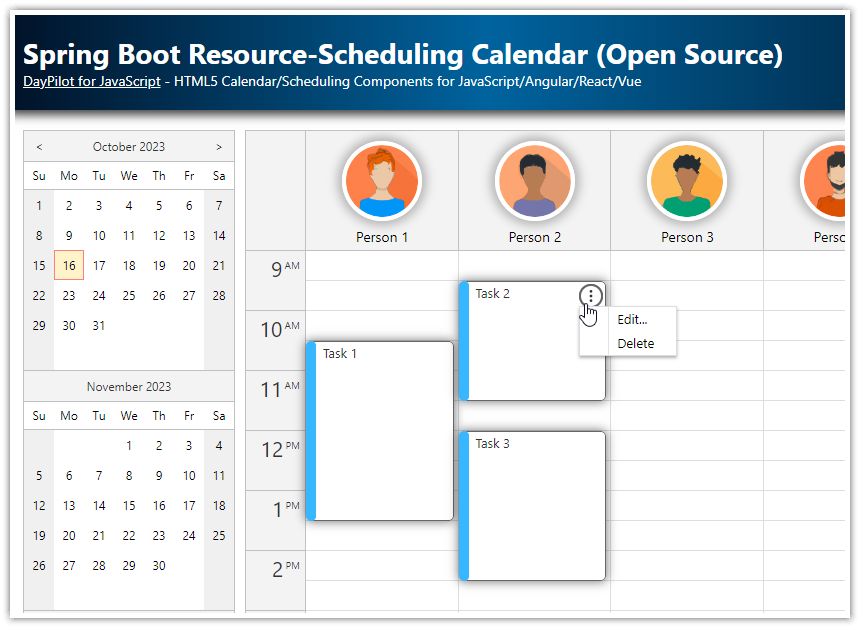
The Vue resource calendar component displays resources (people, rooms, cars, tools) as columns.
-
It is built using the open-source Vue calendar from the DayPilot Lite for JavaScript package.
-
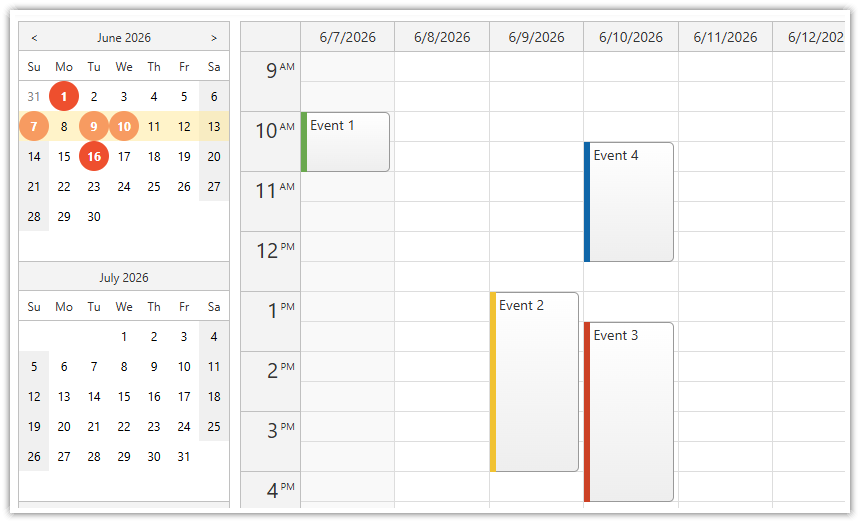
You can switch the current day using a date picker that shows a calendar preview for three months.
-
Days with scheduled events are highlighted in the date picker.
-
The resource calendar lets you schedule tasks, make reservations, and show resource utilization.
-
The Vue calendar project is available for download.
-
The attached project uses Vue 3 and the Composition API to build the calendar.
Resource Calendar in Vue.js
To use the DayPilot resource calendar component in your Vue application, start by installing the @daypilot/daypilot-lite-vue NPM package:
npm install @daypilot/daypilot-lite-vueNow you can add the resource calendar to your Vue application:
-
Create a new
ResourceCalendarVue component. -
Add
<DayPilotCalendar>to the component template. -
To enable the resource calendar mode, add a
viewType="Resources"prop.
<DayPilotCalendar
  ...
  viewType="Resources"
  ...
/>

<!-- ... -->

<script setup>
// ...
import { DayPilot, DayPilotCalendar, DayPilotNavigator } from "@daypilot/daypilot-lite-vue"
// ...
</script>
Show Resources as Columns in the Vue Calendar
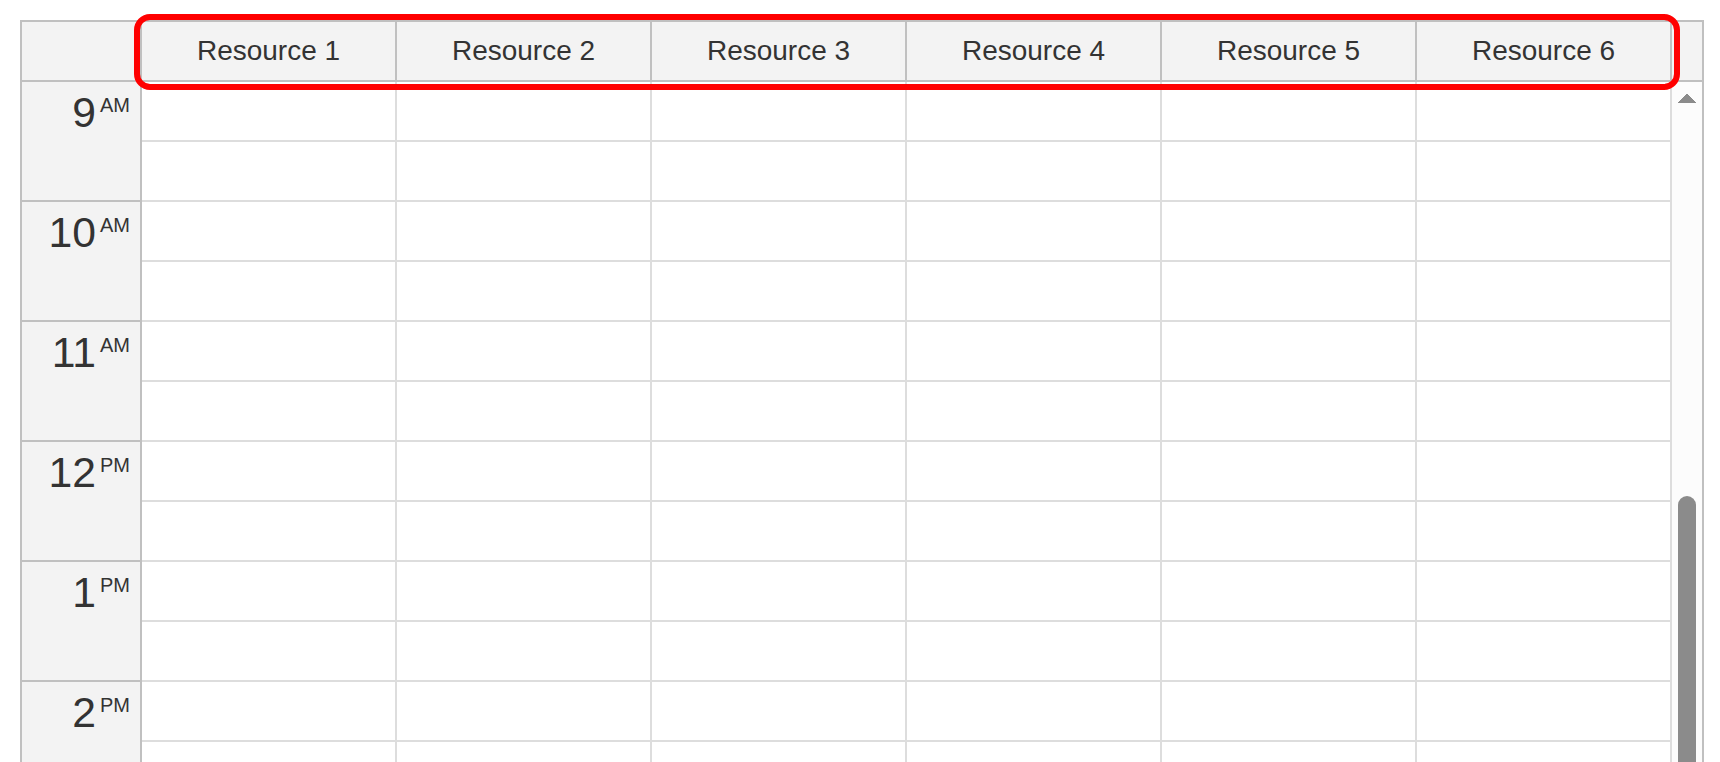
The columns can be defined using the :columns prop. First, we need to add it to the template:
<DayPilotCalendar
  ...
  viewType="Resources"
  ...
  :columns="columns"
  ...
/>
Now we create a new columns variable that will hold the column data.
const columns = ref([])
The loadResources() JavaScript function defines a set of resources statically to make things easier:
const loadResources = () => {
  columns.value = [
    { name: "Resource 1", id: "R1" },
    { name: "Resource 2", id: "R2" },
    { name: "Resource 3", id: "R3" },
    { name: "Resource 4", id: "R4" },
    { name: "Resource 5", id: "R5" },
    { name: "Resource 6", id: "R6" },
  ]
}
When the value of the columns variable changes, the Calendar automatically updates the view to show the resources.
<script setup>
import { ref, onMounted } from "vue"
import { DayPilot, DayPilotCalendar, DayPilotNavigator } from "@daypilot/daypilot-lite-vue"

// ...

const columns = ref([])

// ...

onMounted(() => {
  loadResources()
  loadEvents()
})
</script>
Load and Display Resource Calendar Events/Tasks
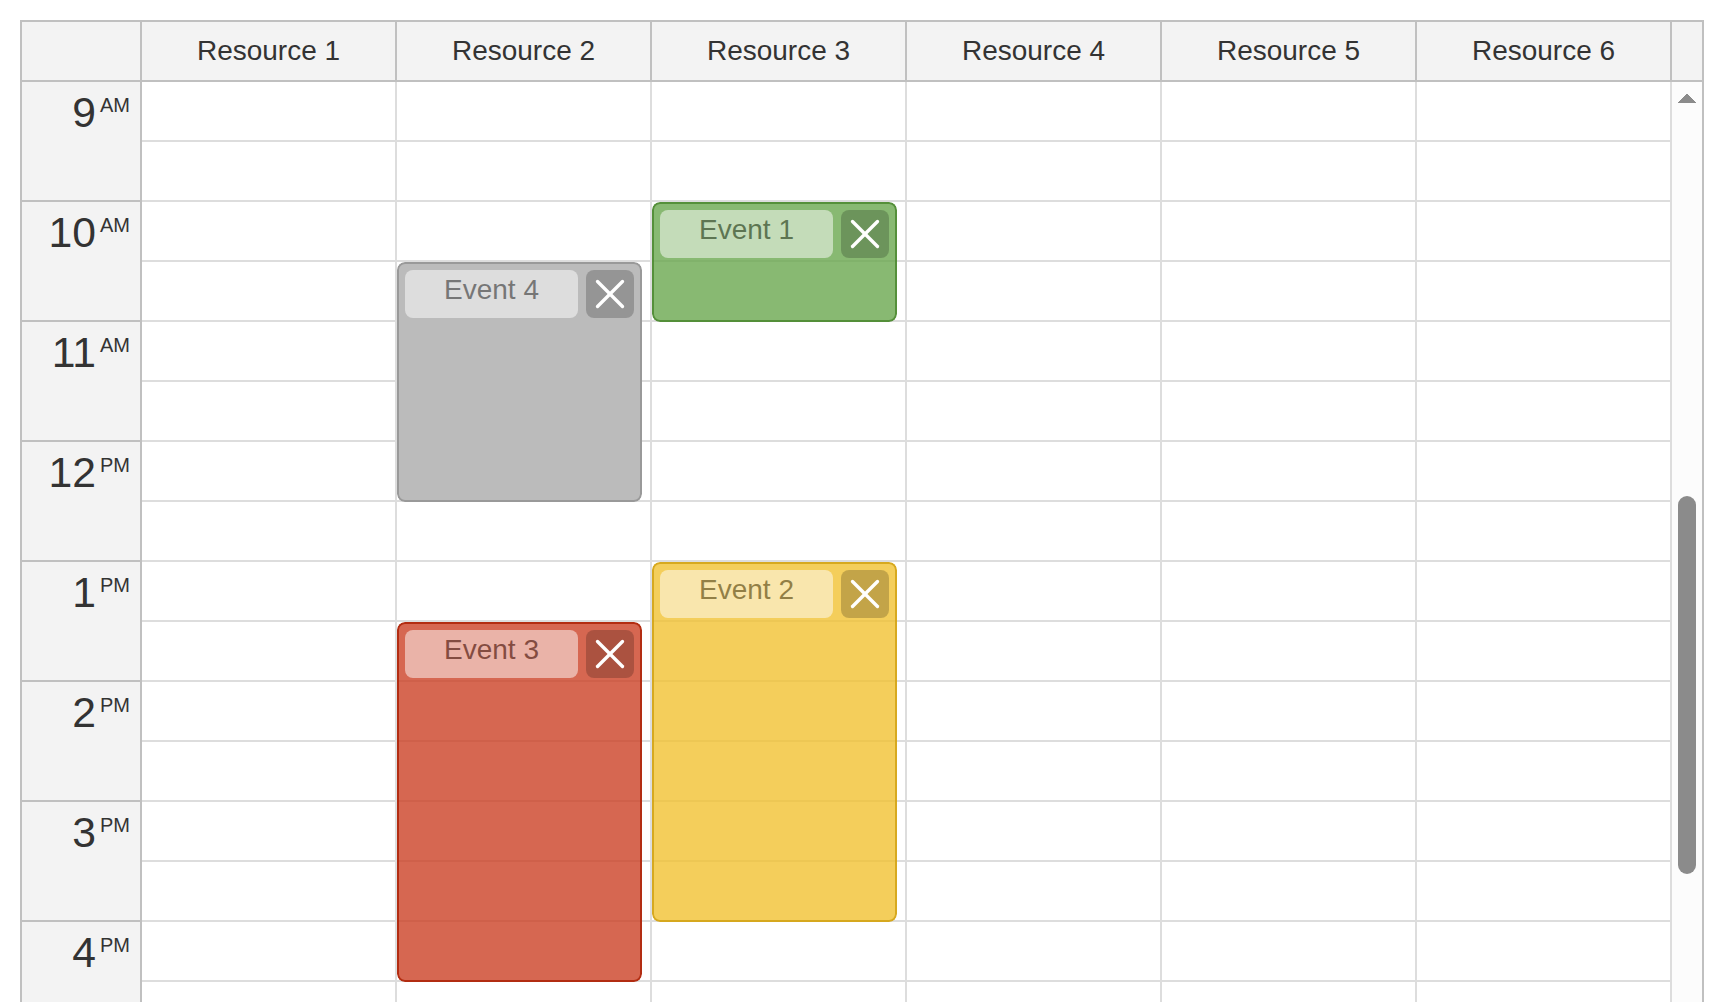
In this step, we load the event data (tasks, reservations) that will be displayed in the main calendar grid.
We bind the :events prop to a new events variable:
<DayPilotCalendar
  ...
  viewType="Resources"
  :events="events"
  :columns="columns"
  ...
/>

<!-- ... -->

<script setup>
// ...
const events = ref([])
const columns = ref([])
// ...
</script>
Each event specifies its resource using the column ID in the resource property. The loadEvents() function is also very simple. We set the event data using events.value:
const loadEvents = () => {
  events.value = [
    { id: 1, start: "2027-09-01T10:00:00", end: "2027-09-01T11:00:00", resource: "R3", text: "Event 1", backColor: "#6aa84fcc" },
    { id: 2, start: "2027-09-01T13:00:00", end: "2027-09-01T16:00:00", resource: "R3", text: "Event 2", backColor: "#f1c232cc" },
    { id: 3, start: "2027-09-01T13:30:00", end: "2027-09-01T16:30:00", resource: "R2", text: "Event 3", backColor: "#cc4125cc" },
    // ...
  ]
}
Add New Events using Drag and Drop
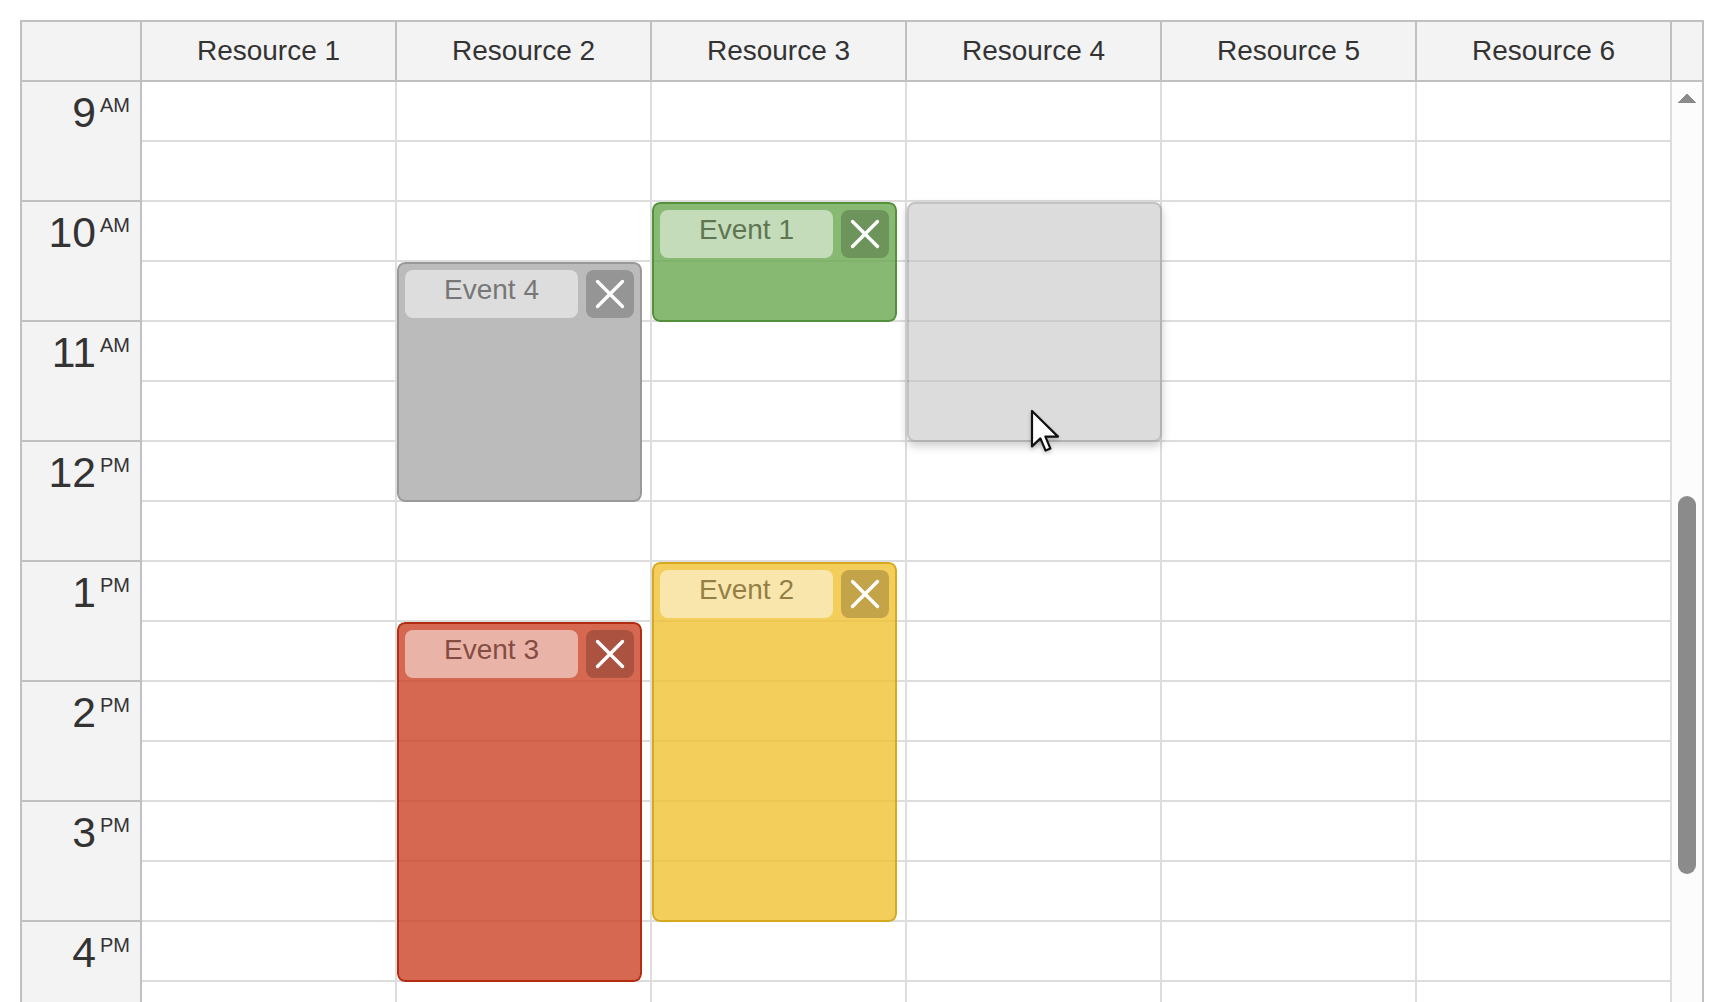
The resource calendar supports adding new events using drag and drop. Users can select a time range for the selected resource (column) and enter details of the new event.
To enable this feature, add an onTimeRangeSelected event handler to the resource calendar:
<DayPilotCalendar
    ref="calendar"
    viewType="Resources"
    :events="events"
    :columns="columns"
    :startDate="startDate"
    timeRangeSelectedHandling="Enabled"
    ...
    @timeRangeSelected="onCalTimeRangeSelected"
    ...
/>

<!-- ... -->

<script setup>
// ...
const calendar = ref(null)
// ...
const onCalTimeRangeSelected = async (args) => {
  await createEvent(args.start, args.end, args.resource)
  calendar.value.control.clearSelection()
}
// ...
</script>
Our onTimeRangeSelected event handler opens a modal dialog for entering details of the new event and then clears the current selection.
Displaying a Modal Dialog
The createEvent() function opens a modal dialog that shows the selected resource, start and end time and lets you enter the event text.
The modal dialog is created using DayPilot.Modal.form() method that lets you create a JavaScript modal dialog with custom form fields programmatically (see also some modal dialog examples).
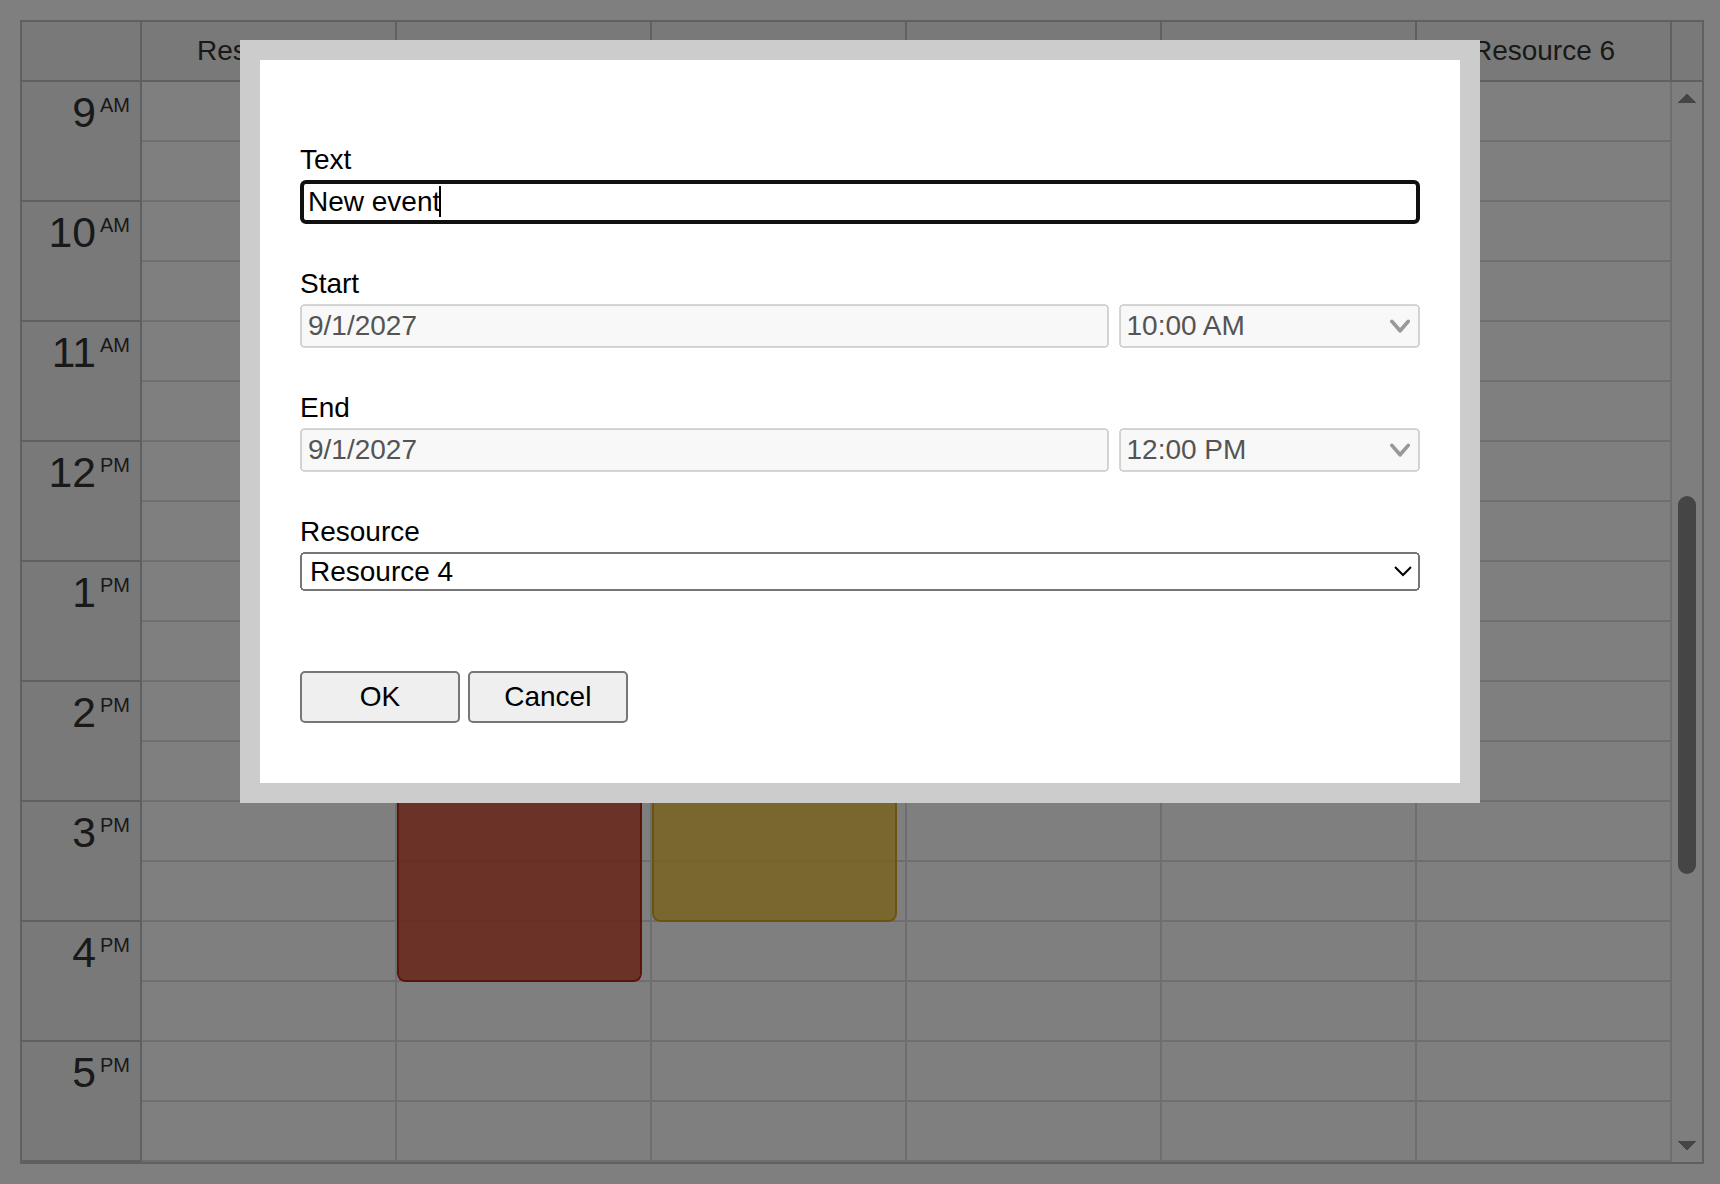
Our “new event” form displays four fields:
-
Text
-
Start
-
End
-
Resource
The DayPilot.Modal.form() method can pre-fill the form fields from the supplied data object. The data object uses data from the current calendar selection (start, end, resource).
As soon as the modal dialog closes, you can access the form result using modal.result property. It’s a copy of the original data object - the properties are updated using the supplied form field values.
const createEvent = async (start, end, resource) => {
  const form = [
    { name: "Text", id: "text" },
    { name: "Start", id: "start", type: "datetime", disabled: true },
    { name: "End", id: "end", type: "datetime", disabled: true },
    { name: "Resource", id: "resource", type: "select", options: calendar.value.control.columns.list },
  ]
  const data = { start, end, resource, id: DayPilot.guid() }
  const modal = await DayPilot.Modal.form(form, data)
  if (modal.canceled) {
    return
  }

  const e = modal.result
  calendar.value.control.events.add(e)
  syncEvents()
}
The events.add() method then adds the new event to the resource calendar. If the user cancels the dialog, no event is added. The syncEvents() helper copies the Calendar event list back into the shared Vue array so the date picker receives the changes as well.
Clearing the Selection
To access the clearSelection() method, we need a reference to the DayPilot.Calendar object:
1. Add ref="calendar" to the <DayPilotCalendar> tag.
2. Define a new calendar variable: const calendar = ref(null)
3. The DayPilot.Calendar object is now accessible as calendar.value.control.
Edit Resource Calendar Events
You can use the same approach to create the “edit” modal dialog.
To open the modal dialog on event click, it is necessary to add an onEventClick event handler to the resource calendar.
<DayPilotCalendar
  ...
  @eventClick="onEventClick"
  ...
/>

<!-- ... -->

<script setup>
// ...
const onEventClick = (args) => {
  editEvent(args.e)
}
// ...
</script>
The editEvent() JavaScript function opens a modal dialog similar to the “new event” dialog from the previous chapter and updates the event using an events.update() call.
const editEvent = async (e) => {
  const form = [
    { name: "Text", id: "text" },
    { name: "Start", id: "start", type: "datetime", disabled: true },
    { name: "End", id: "end", type: "datetime", disabled: true },
    { name: "Resource", id: "resource", type: "select", options: calendar.value.control.columns.list },
  ]
  const data = e.data
  const modal = await DayPilot.Modal.form(form, data)
  if (modal.canceled) {
    return
  }

  calendar.value.control.events.update(modal.result)
  syncEvents()
}
Vue Date Picker with Free/Busy Highlighting
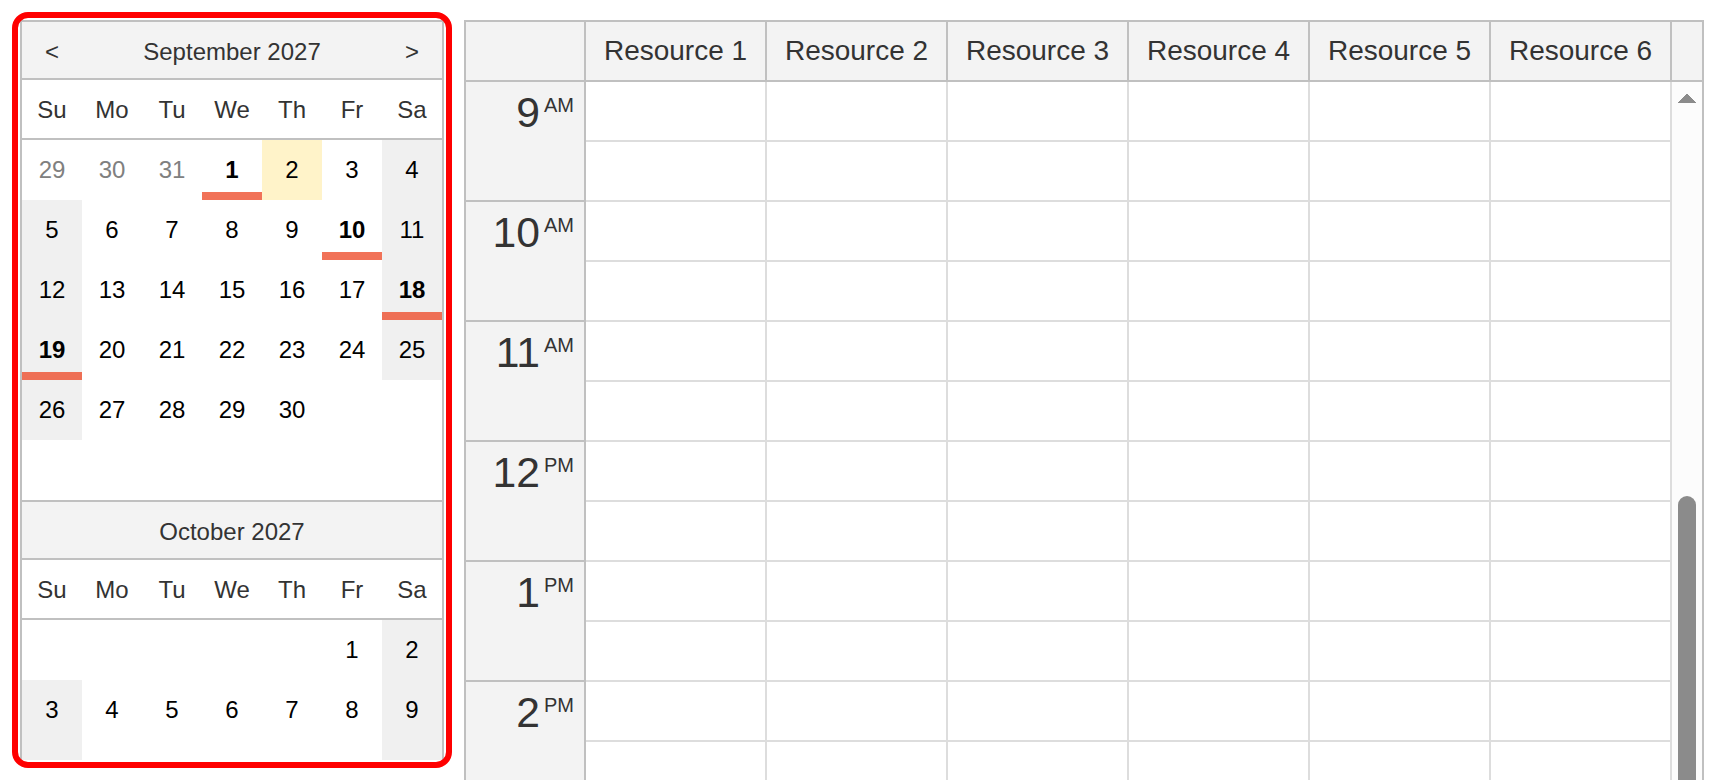
To make the date switching easier, we will add a date picker component that will display an overview of three months and let users change the current date easily. To learn more about the Vue date picker, please see the Vue Date Picker with Free/Busy Highlighting (Open-Source) tutorial. Here is a quick summary of the necessary steps:
The date picker can be added using <DayPilotNavigator> component.
First, it’s necessary to update the layout so there are two independent columns. The left column will display the date picker component and the right column will display the resource calendar:
<template>
  <div class="wrap">
    <div class="left">
      <DayPilotNavigator
        ...
      />
    </div>
    <div class="content">
      <DayPilotCalendar
        ...
      />
    </div>
  </div>
</template>
The parent <div> that is marked with wrap CSS class uses display: flex to show the child elements as columns:
<style>
.wrap {
  display: flex;
}
.left {
  margin-right: 10px;
}
.content {
  flex-grow: 1;
  min-width: 0;
}
/* ... */
</style>
Now we can configure the date picker:
<DayPilotNavigator
          ref="navigator"
          :showMonths="3"
          :skipMonths="3"
          selectMode="Day"
          :startDate="initialNavigatorDate"
          :selectionDay="startDate"
          :events="events"
          @timeRangeSelected="onNavTimeRangeSelected"
      />
The onTimeRangeSelected event handler is fired when a user selects a date in the date picker. We will use this event handler to update the startDate property that is used to define the date displayed by the Calendar:
<DayPilotCalendar
  ...
  :startDate="startDate"
  ...
/>

<!-- ... -->

<script setup>
// ...
const initialNavigatorDate = "2027-09-01"
const startDate = ref("2027-09-01")
// ...
const onNavTimeRangeSelected = (args) => {
  startDate.value = args.day
}
// ...
</script>
Bind selectionDay to the same startDate value so that updating the event data keeps the selected date. To highlight busy days, you can load the event data in the Navigator. Since the data is already available in the events property, we can just bind it to the Navigator :events prop:
<DayPilotNavigator
  ...
  :events="events"
  ...
/>
After each addition, edit or deletion, and after a drag-and-drop move or resize, the sample calls syncEvents() to keep both components in sync:
const syncEvents = () => {
  events.value = calendar.value.control.events.list.map(e => ({ ...e }))
}
This keeps busy-day highlighting up to date and retains event changes when you switch dates. The sample stores events in memory; reloading the page restores the static data. To save reservations permanently, send the changes to your backend from the same handlers.